
Managing a WordPress website comes with its challenges, but exporting and importing posts and pages shouldn’t be one of them. Whether you’re migrating to a new host, creating backups, or sharing content between websites, WordPress makes this process surprisingly simple. In this beginner-friendly guide, we’ll walk you through how to export and import your WordPress posts and pages, step by step.
Table of Contents 📃
Why Export and Import WordPress Content?
There are many reasons you might need to move your WordPress content:
- Website migration: Moving your content to a new domain or hosting provider.
- Backup: Keeping a secure copy of your posts and pages.
- Content sharing: Transferring posts or pages to another WordPress site for collaboration.
Whatever the reason, WordPress has built-in tools to make the process smooth and straightforward.
How to Export WordPress Posts and Pages
Exporting content from WordPress is like creating a package of your posts or pages. Here’s how to do it:
Log into Your WordPress Dashboard Start by logging in to the WordPress admin area of the website you want to export content from.
Navigate to Tools > Export
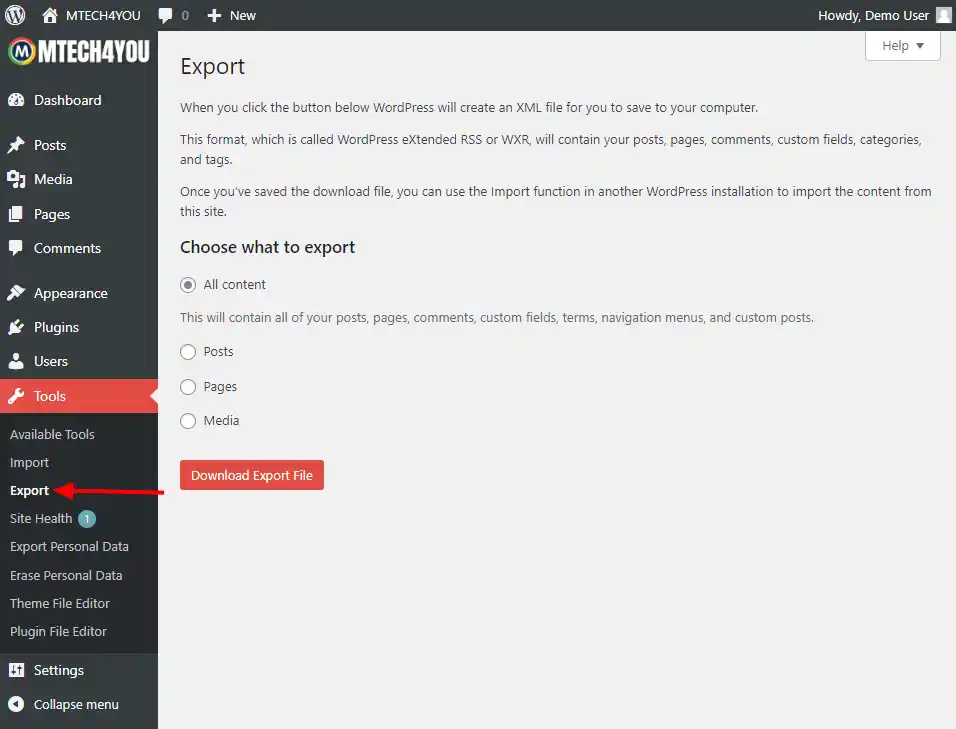
- Go to the left-hand menu and click on Tools.
- Select Export from the submenu.
Choose What to Export
- You’ll see several options: All Content, Posts, Pages, or Media.
- Select Posts or Pages, depending on what you want to export.
Download the Export File
- Click on Download Export File.
- Save the XML file to your computer. This file contains all the information about your posts or pages.
How to Import WordPress Posts and Pages
Once you’ve exported your content, you can easily import it into another WordPress site. Here’s how:
Log into the New WordPress Site
Access the WordPress admin dashboard of the site where you want to import the content.
Navigate to Tools > Import

- In the left-hand menu, go to Tools and select Import.
Install the WordPress Importer Plugin
- If it’s not already installed, click the Install Now link under the WordPress Importer.
- Once installed, click Run Importer.
Upload the XML File
- Click Choose File and select the XML file you downloaded during the export process.
- Click Upload file and import.
Assign Authors and Import Attachments
- Choose whether to assign the content to an existing author or create a new one.
- Check the box to download and import file attachments if needed.
- Click Submit to start the import.
Tips for a Smooth Export and Import Process
- Backup Your Site: Before making any changes, always create a backup of your website.
- Check for Media Files: Media files like images may need to be manually transferred if they’re not included in the export.
- Test After Import: Ensure that all posts, pages, and media files appear correctly on the new site.
FAQs -Frequently Asked Questions
Q: Will exporting and importing affect my original website?
A: No, exporting content creates a copy, leaving your original website intact.
Q: Can I export specific categories or tags?
A: Yes, WordPress allows you to filter posts by categories, tags, and even date ranges during export.
Q: Do I need a plugin for this process?
A: For most basic exports and imports, WordPress’s built-in tools are sufficient. However, plugins like All-in-One WP Migration can help with more complex migrations.
Final Thought (Conclusion)
Exporting and importing WordPress posts and pages is a hassle-free way to manage your website content. Whether you’re a beginner or an experienced user, following these steps ensures your content remains organized and secure.
If you found this guide helpful, share it with others who might benefit. And don’t forget to explore more WordPress tips to enhance your website!