
Learn WordPress, Web Desiging
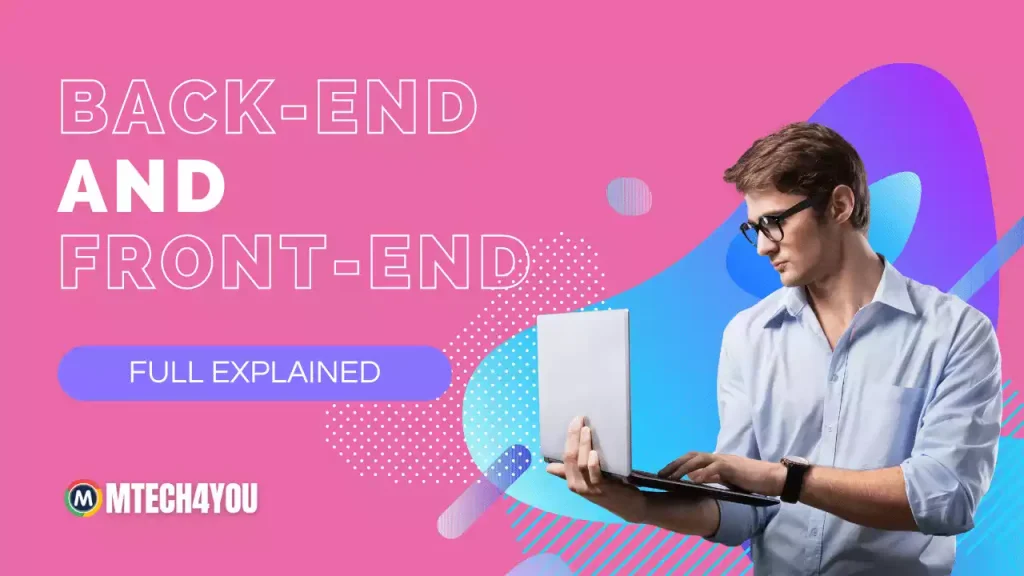
WordPress Back-end & Front-end Full Explained
Apr
WordPress is a popular content management system that powers millions of websites across the internet. It allows users to create and manage their websites easily, with a user-friendly interface and a wide range of customizable features. But behind the scenes, there is a complex system known as the WordPress back-end that makes it all possible.
In this article, we will explore what the WordPress back-end is, how it works, and what you need to know to get the most out of it.
Table of Contents
What is the WordPress Back-end?
The WordPress back-end, also known as the administrative area or the dashboard, is the area of your website where you can manage your content, customize your website, and control various settings. It is the control center of your website that allows you to make changes to the front end, or the visible part of your website, without any coding knowledge.

The back end is accessible only to website administrators and requires a login to access. Once you log in, you will be taken to the dashboard, which is the main control panel for your website.
How Does the WordPress Back-end Work?
The WordPress back-end is powered by a combination of PHP, HTML, and JavaScript code. It runs on the server side, which means that all the data and functionality are stored on the web server and processed by the server before being sent to the user’s web browser.
The back end is built around a system of menus and sub-menus that provide access to all the different features and functions of your website. From the dashboard, you can create and edit pages and posts, customize your website’s appearance, install and activate plugins and themes, and manage your website’s settings.
WordPress also allows for the creation of custom post types and taxonomies, which are used to organize and categorize your content. This makes it easy to create complex websites with a variety of different content types, such as blogs, portfolios, e-commerce sites, and more.
What Do You Need to Know About the WordPress Back-end?
To get the most out of your WordPress website, it is important to have a good understanding of the back end. Here are some of the key things you should know:
- The Dashboard: The dashboard is the main control panel for your website, and it provides access to all the different features and functions of your site. Spend some time familiarizing yourself with the different menus and options.
- Content Management: The back end allows you to create and manage all the content on your website, including pages, posts, media files, and more. You can use the built-in editor to format your content, add images and videos, and customize your posts and pages.
- Plugins and Themes: Plugins and themes are essential components of the WordPress ecosystem. They allow you to add new features and functionality to your site, and customize your website’s appearance. Be sure to install and activate only reputable plugins and themes from trusted sources.
- Security: The back end of your website contains sensitive information and should be protected from unauthorized access. Use strong passwords, limit access to the back end to trusted users, and install security plugins to help protect your site.
What is the WordPress Front-end?
The WordPress front end is part of your website that your visitors see when they visit your website. It is the visual representation of your website and the content that you have created using the WordPress back-end.

The front end is powered by a combination of HTML, CSS, and JavaScript code. These languages are used to create the structure, style, and interactivity of your website. The front end is also responsible for fetching and displaying the content that you have created on the back end.
How Does the WordPress Front-end Work?
The WordPress front end is built using a combination of templates and themes. Templates are used to define the structure and layout of your website, while themes provide styling and visual design.
When a visitor accesses your website, the WordPress front-end fetches the appropriate template and theme files from your web server and assembles them into a complete web page. The front end also fetches the content that you have created on the back end and displays it in the appropriate locations on your website.
In addition to displaying your content, the WordPress front end can also provide interactive elements, such as forms, menus, and buttons. These elements are powered by JavaScript code, which runs on the user’s web browser.
What Do You Need to Know About the WordPress Front-end?
To get the most out of your WordPress website, it is important to have a good understanding of the front end. Here are some of the key things you should know:
- Templates and Themes: Templates and themes are essential components of the WordPress front end. They determine the structure, layout, and visual design of your website. You can customize templates and themes to create a unique look and feel for your site.
- Content: The front end displays the content that you have created on the back end. Make sure that your content is well-organized, easy to read, and visually appealing.
- Plugins: Plugins can add additional functionality to your website, such as contact forms, social media integration, and more. Be careful when selecting and installing plugins, as they can impact the performance and security of your website.
- Performance: The performance of your website is critical to its success. Optimize your website for speed and responsiveness, and consider using a content delivery network (CDN) to improve load times.
What Difference Between the Front End and Backend?
In today’s world of technology, web development has become an important aspect of our lives. It is a crucial process that involves designing and building websites, web applications, and other digital tools. In web development, there are two types of programming: front-end and back-end. In this article, we will discuss the differences between the front-end and back-end and the user roles that access the back-end of a website.
Front-End vs Back-End
Front-end development is responsible for the user interface of a website. It is part of web development that focuses on creating the visual elements that users interact with, such as buttons, forms, and other graphical elements. The front end is also responsible for the website’s responsiveness, ensuring that it is optimized for different devices and screen sizes.
On the other hand, back-end development is responsible for the server side of a website. It is part of web development that focuses on the functionality of the website, such as storing and retrieving data, user authentication, and other server-side operations. Back-end developers use programming languages like PHP, Python, Ruby, and Java to build the server side of a website.
User Roles on the Back-End
The back end of a website is where sensitive information is stored, and it is important to restrict access to this information to authorized personnel only. Here are some of the user roles that can access the back end of a website:
- Super Admin: This is the highest level of access to the back end of a website. A super admin can perform all the tasks that other roles can do, as well as add or remove other users.
- Admin: An admin has access to all the website’s features and can perform tasks such as adding or removing content, managing users, and changing website settings.
- Editor: An editor can add, edit, and delete content on the website but does not have access to the website’s settings or other administrative functions.
- Author: An author can add and edit their own content on the website but does not have access to other users’ content or administrative functions.
- Subscriber: A subscriber can only view the website’s content and does not have any editing or administrative functions.
It is important to note that the user roles and access levels may vary depending on the website’s purpose and the content management system (CMS) used.
Customization WordPress Back-end or Dashboard

WordPress is a powerful content management system that offers an easy-to-use back-end or dashboard that enables website owners to manage their sites with ease. While the default WordPress dashboard is functional, it may not always be suitable for everyone’s needs. Thankfully, WordPress provides several customization options that allow users to personalize their dashboard to their liking. In this article, we will provide a step-by-step guide on how to customize your WordPress back-end dashboard, from basic to advanced techniques, using the White Label CMS and Admin Menu Editor plugins.
Step 1: Accessing the WordPress Dashboard
To access the WordPress dashboard, you need to log in to your WordPress account. Once you are logged in, you will be redirected to the dashboard, which is the administrative panel of your website. The dashboard provides access to all the features and settings of your WordPress site.
Step 2: Basic Customizations
Before we dive into advanced customization techniques, let’s take a look at some basic customizations that you can make to your WordPress dashboard.
- Changing the Dashboard Color Scheme: You can change the color scheme of the dashboard by clicking on your profile picture at the top right corner of the screen, selecting “Edit Profile,” and then selecting a new color scheme from the drop-down menu.
- Rearranging Dashboard Widgets: The dashboard widgets are the boxes that provide quick access to different areas of your site. You can rearrange them by dragging and dropping them into the desired positions.
- Adding New Dashboard Widgets: You can add new widgets to the dashboard by clicking on the “Screen Options” button at the top right corner of the screen and selecting the widgets you want to add.
- Customizing the Dashboard Menu: You can customize the dashboard menu by clicking on the “Appearance” tab on the left-hand side of the screen and selecting “Menus.” From there, you can add, remove, and rearrange menu items to suit your needs.
WordPress is a versatile content management system that offers a range of customization options to users. Advanced customizations can be achieved using plugins like White Label CMS and Admin Menu Editor. In this article, we will provide a step-by-step guide on how to customize your WordPress dashboard using these plugins.
Step 3: Installing the White Label CMS Plugin
The White Label CMS plugin is a popular tool for customizing the WordPress dashboard. To install it, follow these steps:
- Log in to your WordPress dashboard.
- Click on “Plugins” in the left-hand menu.
- Click on “Add New.”
- In the search bar, type “White Label CMS” and click “Enter.”
- Click on “Install Now.”
- Once the installation is complete, click on “Activate.”
Step 4: Basic White Label CMS Customizations
Once the White Label CMS plugin is installed, you can begin customizing your WordPress dashboard. Here are some basic customizations you can make:
- Change the Logo: To change the logo on the WordPress dashboard, go to “White Label CMS” in the left-hand menu and select “Login Screen.” From here, you can upload a new logo or choose one from the media library.
- Change the Dashboard Colors: To change the colors on the WordPress dashboard, go to “White Label CMS” in the left-hand menu and select “Dashboard Colors.” From here, you can choose a new color scheme or create your own.
- Remove Dashboard Widgets: To remove dashboard widgets, go to “White Label CMS” in the left-hand menu and select “Dashboard Widgets.” From here, you can disable or remove any widgets you don’t want to see on your dashboard.
Step 5: Installing the Admin Menu Editor Plugin
The Admin Theme Editor plugin is another useful tool for customizing the WordPress dashboard. To install it, follow these steps:
- Log in to your WordPress dashboard.
- Click on “Plugins” in the left-hand menu.
- Click on “Add New.”
- In the search bar, type “Admin Menu Editor” and click “Enter.”
- Click on “Install Now.”
- Once the installation is complete, click on “Activate.”
Step 6: Advanced Customizations using Admin Menu Editor
Once the Admin Menu Editor plugin is installed, you can make advanced customizations to the WordPress dashboard. Here are some examples:
- Change the Fonts: To change the fonts on the WordPress dashboard, go to “Appearance” in the left-hand menu and select “Admin Menu Editor.” From here, you can customize the font family, size, and weight.
- Change the Colors: To change the colors on the WordPress dashboard, go to “Appearance” in the left-hand menu and select “Admin Menu Editor.” From here, you can customize the background color, text color, and link color.
- Add Custom CSS: To add custom CSS to the WordPress dashboard, go to “Appearance” in the left-hand menu and select “Admin Menu Editor.” From here, you can add your own CSS code to modify the appearance of the dashboard.
In conclusion, White Label CMS and Admin Menu Editor plugins provide WordPress users with advanced customization options for their dashboard, With these tools, you can personalize your WordPress dashboard to suit your needs and preferences. Follow the steps outlined in this article to get started with your advanced customizations.
How to Replace/Remove WordPress Branding to our custom Branding using White Label CMS Plugin, Step by Step Guide.
WordPress is a powerful content management system (CMS) that powers millions of websites worldwide. While WordPress is a great platform, some users may want to replace or remove the WordPress branding on their site to give it a more customized look. The White Label CMS plugin is an excellent tool for accomplishing this. In this article, we’ll provide a step-by-step guide on how to replace or remove WordPress branding using the White Label CMS plugin.
Step 1: Install the White Label CMS Plugin
The first step to replacing or removing WordPress branding is to install the White Label CMS plugin. Follow these steps to install the plugin:
- Log in to your WordPress dashboard.
- Click on “Plugins” in the left-hand menu.
- Click on “Add New.”
- In the search bar, type “White Label CMS” and press “Enter.”
- Click on “Install Now.”
- Once the installation is complete, click on “Activate.”
Step 2: Customize the Login Screen
The login screen is the first thing users see when they try to access your website. By customizing the login screen, you can replace the WordPress branding with your own. Here’s how to do it:
- Go to “White Label CMS” in the left-hand menu and select “Login Screen.”
- Upload your own logo or choose one from the media library.
- Enter the title and description you want to appear on the login screen.
- Customize the background color and the login button color if needed.
- Click “Save Changes.”
Step 3: Customize the Admin Bar
The admin bar is the black bar that appears at the top of the WordPress dashboard. You can customize this bar to replace the WordPress branding with your own. Here’s how to do it:
- Go to “White Label CMS” in the left-hand menu and select “Admin Bar.”
- Upload your own logo or choose one from the media library.
- Enter the text you want to appear next to the logo.
- Customize the colors of the admin bar if needed.
- Click “Save Changes.”
Step 4: Customize the Dashboard
The dashboard is the main screen users see when they log in to the WordPress admin area. You can customize this screen to remove the WordPress branding and replace it with your own. Here’s how to do it:
- Go to “White Label CMS” in the left-hand menu and select “Dashboard.”
- Remove any widgets you don’t want to appear on the dashboard.
- Customize the color scheme of the dashboard if needed.
- Upload your own logo or choose one from the media library.
- Enter the text you want to appear next to the logo.
- Click “Save Changes.”
Step 5: Customize the Footer
The footer is the bottom section of the WordPress dashboard. You can customize this section to replace the WordPress branding with your own. Here’s how to do it:
- Go to “White Label CMS” in the left-hand menu and select “Footer.”
- Customize the text and links that appear in the footer.
- Click “Save Changes.”
In conclusion, WordPress offers great customization options for both the front-end and back-end of your website. With the help of plugins such as White Label CMS and Admin Menu Editor, you can easily customize your WordPress dashboard to suit your needs. Additionally, by replacing the WordPress branding with your own using the White Label CMS plugin, you can give your website a professional and customized look. Whether you’re a beginner or an advanced user, these customization options are easy to implement and can make a big difference in the overall appearance of your website.